
When getting into the world of handmade dice it can be an expensive hobby to pick up, especially when looking at all the bits of equipment you need if you are going to create everything yourself. Knowing what you need or can make do without helps, know what to do also goes a long way with finding your feet and being able to enjoy this hobby rather than feeling frustrated at the failures.
This article is going to focus on moulds as that is what I currently am making with my new masters. Now, I have made a lot of dice moulds, from sprue to cap, slab (or cake) to individual but my current mould of choice is individual cap. They might have a slightly more silicone intensive creation, but the ability to only cast one die if I need to and only replace what is worn out cuts down costs in the long run. Not to mention a bigger work space for adding inclusions and a bigger surface area for those pesky bubbles to vent.
Dice moulds are not just dump the dice in a box, pour over the silicone and voila! There is work to be done to make sure that the moulds are going to come out crisp and not waste a ton of silicone.
Checking out dice mould making on YouTube is definitely a start, but it pays to remember that these techniques are what work for these creators and may need tweaking to make them work for you, especially if you are unable to get the supplies that they are using. Another thing to remember is that if this is your first attempt, it is not the first attempt of the creator. They know the nuances of what they are making the mould with and have it down to an art so to speak so if youre struggling to get tape to lay flat for example, don’t get disheartened!
Getting Started:
Before we go much further, here is a list of everything I use to make my handmade dice moulds. This does not mean that you need these specifically but you can see at least what is involved and it might be that you already own some of these.
- 3D printed pipe for the size of each dice I want to cast (more about this later)
- 3M clear and wide tape
- 3D printed masters
- Hot glue gun and copious amounts of glue sticks
- Petroleum jelly
- Pointed ear buds (Q-Tips I believe is the brand name that is associated with them in America, but they are the small cotton swabs on a tiny stick that are pointy rather than bulbous)
- Isopropyl alcohol
- Regular Sellotape
- Metal cuticle remover
- Sharp craft knife
- Flat, square wall tile
- Pressure pot and air compressor
- Tin cure silicone (more about this later too)
That’s a pretty long list, right? But as before, there may be things that you already own that will do the job so I’ll get to explaining what I use each bit for and what alternatives I have heard about being used if there is one.
Making the base
Prepping your masters:
So the first thing I do is pull on some gloves to avoid fingerprints and then give the masters a polish with a soft cloth, check for any deformities one last time and then set them aside. You can check out my post on printing and preparing your 3D printed masters to see an overview of how I get them to the stage where I can then cast them in a handmade dice mould as ‘part one’ of the process.
Its not so much that the fingerprints will be cast in the silicone if you leave them on, but the oils from your skin can mess up the surface shine of your dice, so less oil = more of that hard earnt shine is kept!
Prepping your mould casing:
Advanced Warning: Do not use cookware (like the springform cake tins) unless you are 10,000% sure that the non-stick coating does NOT contain silicone and that you are equally sure that the silicone you are using to cast is food safe.
So your dice mould casing is the pipe, Lego wall box, hot glued acrylic plastic sheets etc… Whatever it is that you are going to use to contain the silicon that your mould will be made of.

To explain a bit about my personal mould casing of choice, I 3D printed my own pipes for each dice for three reasons. One; because my dice are oversized so I would need a fairly hefty size of pipe to ensure that all of them sat nicely in the middle. Which leads onto two; hefty pipes lead to hefty moulds meaning that I have to sacrifice precious space in the pressure pot to fit them all in. Finally three; the d10, d%, d4 and d8 are all elongated, meaning that ovals would be a better shape than a circle reducing the amount of silicone needed.
Granted it took nearly 15 hours to print them all but I have custom pipes for my specific dice, although I still use the pipe connector for my slab/cake mould so it really depends on the resources you have access to and what works best for what you want.
Get your petroleum jelly, stick your finger in and then coat the inside of your pipe with a thin layer. You can use whatever you want to apply it as long as you get a thin layer. This step isn’t completely necissary, I got a 10 cm mould out of its pipe (holding an 8cm chonk!) after I forgot to petroleum jelly the sides, it was just hard hard hard work, harder than it should have been and could have been if I had just greased the sides.
Once all the pipes have been done, wipe down your hands/wash them and dry them thoroughly. Get your clear 3M tape, your tile (if you have one) and regular Sellotape. Best advice I can give here is to take off your gloves if you are still wearing them as you will stick like crazy to the Sellotape if you keep them on!
Just to step in again, I use 3M as that’s what people have recommended to use to avoid cure inhibition in the silicone due to the glue used on the tape. Now, here are the things that make me doubt that you need to use exclusively that brand…
One; there doesn’t seem to be any mention of if they used the ‘off-brand’ one that caused their cure inhibition with a tin or a platinum cure silicone, because as platinum cure doesnt play well with 3D printed masters, was it actually the dice? Two; I’ve seen people using the sticky back plastic used to cover books (like at school) with no problem, as this is not a 3M product the glue doesn’t appear to be the issue with cure inhibition?
If you have the tile:
Lay it down and grab up the wide tape and while only touching the end, pull of a bit that reaches across the tile. Lay it over the tile sticky side up and on the end you aren’t holding, use the regular tape to stick it own firmly on your workspace. Then do the same with the end you are holding which should result in a tight pull of the wide tape over the tile. Take a second peice of wide tape and follow the same instructions but overlap it slightly with the first peice. This creates a nice flat base that your master and pipe will stick to.
If you don’t have a tile:
Get your wide tape peice, making sure it is longer than the pipe is wide and get it sticky side up. Using a piece of paper to show you where the pipe will sit helps, so that you can see how long a strip you need to cut/tear off. Tape one end down firmly, if you can tape it over the edge of your desk to get a flat tension the better, tape down the other end pulling firmly but not hard enough that the other end becomes unstuck. Do the same as above with the second strip, overlapping slightly to create a join.
The use of a tile here allows you to get some tension to get the tape taut reducing the crinkles that can affect the surface of your mould, but you can still get the sticky surface without a tile but it might take some practice to get it as flat as possible.
One thing to consider is that the join will create a line leading up to the edge of your die face unless you smoosh the tape down together, or if you position the pipe so that the line is more off to the side you can position the face of the die not on a join. The avoidance of lines at all is also why some people just use sticky-back plastic!
Placing the die and pipe:
Decide what number you want at the top of the dice mould, eg: what number do you want on the lid? Some people use the low numbers as the most flawless part is then going to be the top number. Personally, I have switched to having the high numbers on the lid as if I add inclusions in there and have a base of either colour or filler (like moss) these are going to be on the low numbers, and therefore keeping the interesting part visible on the high ones.
At this point, heat up your glue gun too.
Once you have made your number choice, put your gloves back on (to prevent the oil transfer from your skin), give the die one last polish with your soft cloth and then stick that number to the tape base you just created. Press firmly down, you do not want any crinkles or gaps where silicone can leak under the face. Then take your petroleum jelly pipe and while standing over your die, place the pipe down so that your die is central to it. Press down firmly but avoid exerting any sideways movement so that the tape doesnt break free and potentially bunch up.
Hot glue:
Without detaching the tape from its anchor points, lay a bead of hot glue around the outside of the pipe, sealing the pipe to the tape base. Fill in any gaps as it pools and solidifies because just as much as you don’t want silicone under the face of your die, you don’t want it leaking out from the under the rim of your pipe.
Once cold you can detach your anchor point tape bits.
The value of having big tape and sticking the sucker down is found here. Your hot glue is going to warp and slightly melt the tape, if its not kept taut then it can cause ridges on the face and it can curl up and over the hot glue itself making it a nightmare to try and remove later when you need to get to the face of your die. Trust me… Been there, done that, got the burnt fingers to prove it.
Now what?
You can trim the excess tape from around the hot glue but leave about 0.5cm to ensure you can actually grab it to peel it away later. Now you need to mix up your silicone to be able to pour it.
Silicone:

This is where it can get a little tricky if you are unfamiliar with silicone. Not every silicone is the same, much like different resins from even the same brand can have different properties, this also is true for the stuff you make the dice moulds from.
While colour is an obvious difference, do you want mint green, yellow, white or clear-ish, there are subtle differences in the formula that affect how the silicone behaves once cured and also before curing.
You have four main things to consider:
- Cure inhibition
- Hardness
- Cure time
- Durability
Cure inhibition relates to the aforementioned 3D printed masters, the sulphur in the majority of them do not play well with silicone that uses platinum as a catalyst, leading to gummy parts stuck in the numbers or over the entier face of your dice. Your best option here is to use one that has tin as the catalyst, and while not many off brand ones will state this, the majority of the cheaper silicone kits that you can find on online marketplaces are tin based and would do what you need it to do.
Hardness relates to the flexibility of the cured silicone. The tin cure generic ones do not usually state a hardness, but I’ve seen some sellers state that they are a 10 (doubtful) and others 20 on the ‘shore hardness’ scale. The ones I’ve used do seem to be a 20, not super stretchy but I can pop even a d20 out of the middle of a slab/cake mould without too much effort or tearing. My huge chonk mould uses the same stuff and that was a grade-A pain to get the master out of it, once I cast the workable master in that I am inclined to cut it out before casting that into a 10 rated silicone later… But thats another story!
Cure time relates to how long it take the silicone to go from both parts together in one cup to set. Some have a super quick cure time, 4 hours or less, others can be up to 12 or even 24. One thing to consider is that even though it is exciting to get your moulds done ASAP, with a short cure time there can also be a short pot life. A short pot life means that you only get a certian amount of time to get the silicone mixed and into your dice moulds, which can create problems when the best moulds need to be poured slowly to remove as many bubbles as possible. I go for 12 hour cure time, mainly because thats the norm for the cheaper silicones I go for but also I get to pour later in the day and then leave it overnight to fully cure without being able to clock-watch and do the whole ‘is it time?’ dance around the pressure pot. Added bonus is that it gives me something fun to wake up to, almost like Christmas but for dice addicts!
Durability, essentially how long will it last. Resin cures due to heat created by the chemicals once mixed together. Over time this will degrade your mould, you might see that there are brighter white edges or your numbers tear off as they have lost their elasticity. This can be compounded if the silicone is too hard, and its a fight to get the dice out without tearing the mould corners, especially on a d20 as thats a big object getting though a tiny triangle hole. Tin silicone doesn’t last as long as platinum, but that might also be because the platinum is able to be formulated to be squishier and more malleable than tin based ones. For my personal experience though, I have used exclusively tin and have had 11 sets out of one slab/cake dice mould before it started to go white on the edges, the mould itself is still fine in my case but your mileage may vary.
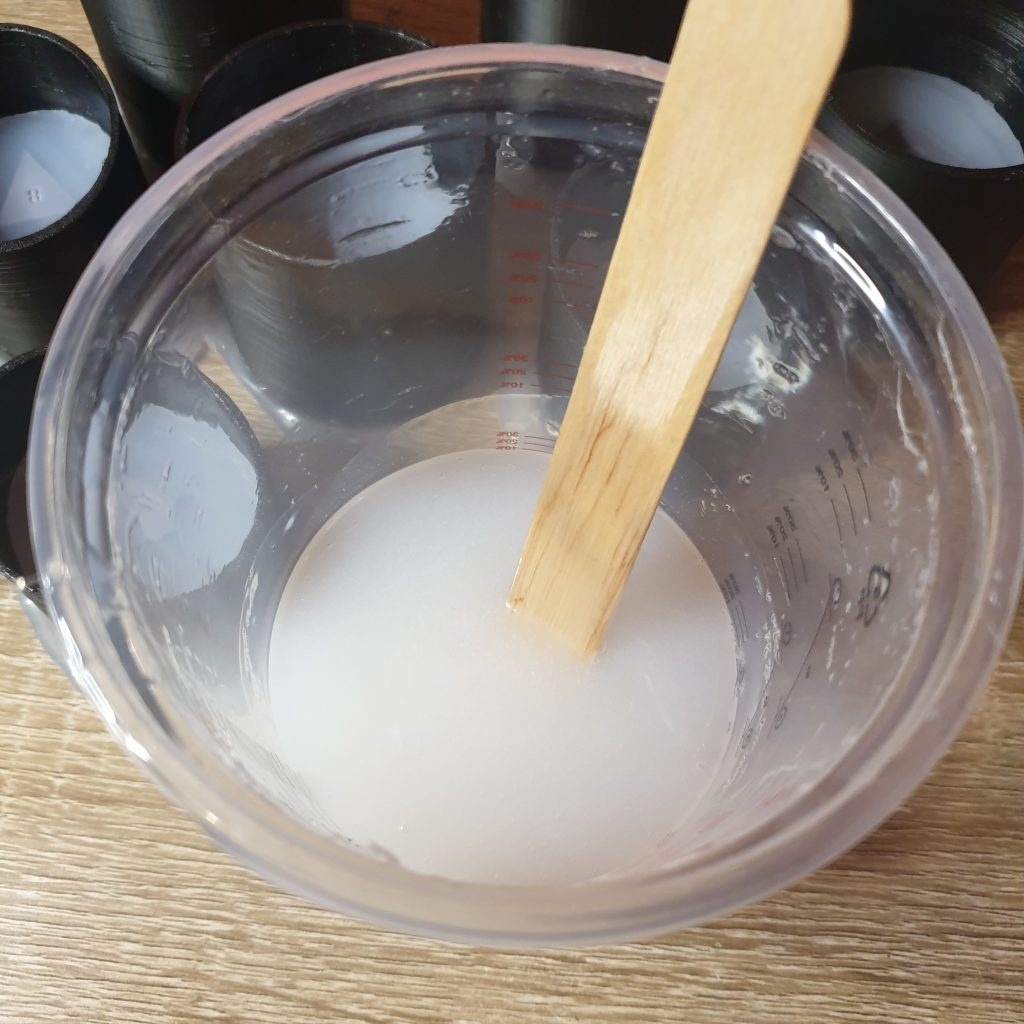
As I just use a generic silicone from online marketplaces, I shamelessly just pick whatever is cheapest at the time. You can be more picky based on the above points or be a bit more renegade like I am. But once you have your chosen silicone, mixed up for about 5 minutes (your hand should ache!) and in a cup do not just slosh it into the mould.
When mixing, you are going to get air bubbles, you need as many of these to escape as possible and you also do not want to trap new ones in the mould, like in the numbers. Stand up, get a light source shining onto your mould so you can see the working area inside and pour at the side of the die in a tiny tiny stream.

Your silicone stream needs to hit the tape at the bottom so that it can slowly sweep around and fill in all the nooks and crannies around your die. Not only this but the thin stream allows any air bubbles to just pop as there is not enough surface tension to keep them trapped. And when I say stand up, I mean stand up as you will regret it otherwise. If you are sat you need to raise your arm up to eye level to get a thin stream and holding a cup of air at that height is going to get tiring let alone a cup of silicone. By standing up you can see exactly what you are doing and you arm isn’t going to cramp after three moulds have been poured.
While this is a shot of pouring the caps, it demonstrates how small you need the stream of silicone to be. But I didn’t follow my stand up and pour as I had to crouch down to get the cup, stream and mould into the shot, even this ached my arm as I was lining everything up and getting into focus!

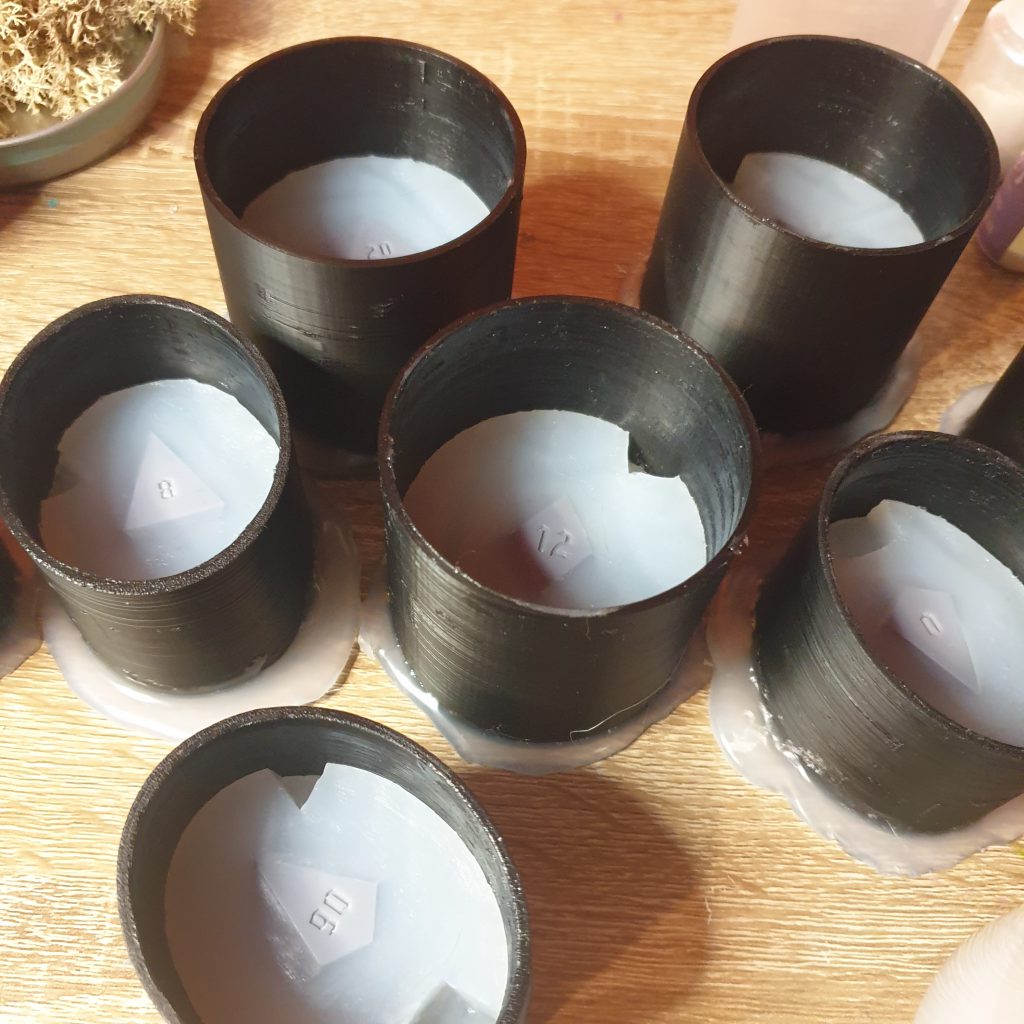
Once your die is just covered, add another 1cm approximately of silicone into the mould, still keeping the stream thin. This will give it a sturdy base that you will need for when you come to extract your masters from their moulds. Here’s a cross section of a d8 mould showing the base thickness and the registration key cut into the top corner.
And now you wait:
If you’ve got a pressure pot, stick them in there at about 5-10 PSI over what you intend to cast dice at. If you don’t, then leave them on a level surface, ideally covered so that dust and pet hair/your hair don’t get stuck in them and that they can’t get knocked over.
Making the caps
Once your moulds are cured for the stated time, grab up one and peel the tape from the bottom of it. Don’t worry about tape residue on the face if there is any, we will get to that later.
Push your mould out of the tube from the solid side (which is the actual base of the mould), the petroleum jelly should make it slip right out. I would also advise to write in sharpie the die that corresponds to that mould, as later on you don’t want to be trying on a selection of lids trying to work out what ones are a pair.
Tidying up and registration keys:

At this time I do two things, I get the cuticle trimmer and run it around the base of the mould taking off the little meniscus that has now set. This makes me happy as it looks neat and also flattens it out. You can use a craft knife to delicately cut it off if you pinch it upwards and pull to keep the tension as you go around but its a bit trickier. The second thing is that I cut my keys.
The keys or registration keys are going to ensure that your lid is snug on there and also only goes on one way so that the numbers are where they should be. I personally use two keys on my smaller/individual moulds and three on my larger ones.

For the two I make one square cut out and one triangle. Larger requires two triangles and one square, all slightly odd distances apart so that the lid very definitely can only go on one way. You sharp craft knife gets to shine here, for the square, get it on the corner of the top of the mould and drag it backwards so that it then slices lines in the top, then join those lines up with another cut before finally carefully slicing away at the silicone that is holding onto your key, think silicone surgery. For the triangle, youre going to want to make your cut out look like a Trivial Pursuit cheese wedge.
Be careful not to stab your knife too far into your silicone as you can catch your master conversely, don’t make it so shallow that you have a hard time keeping it locked in place.
Cleaning the faces:
Now to spend time cleaning the face of your master again. Using a pointy ear bud/Q-Tip, soak it in a little isopropyl alcohol and use that to dissolve the glue residue using the other end to wipe it dry and take away the little lumps of gunk. Once the face is clear and shiny, gently reseat the edge of the die by pulling a little on the edge of the mould and letting it snap back into place. Finally finishing up by getting some of the regular Sellotape and using it to pick up any straggling bits on the face of the mould.
Petroleum jelly as mould release:

Get some more of those pointy ear buds/Q-Tips and dunk it in the petroleum jelly, then starting from the outside in so you don’t dollop too much next to the die face, smooth on the petroleum jelly to give the silicone a layer. The point will allow you to get right up close to the exposed die face without getting any on it (if you’re steady) and allow you to get into the corners of the registration keys really well. The layer will look like its drying out in some places but you can add a little bit more to ensure that it’s got a decent coating. This should not have any lumps or big smears, just a nice thin layer.
Re-seating your moulds:
The pipe you have should be large enough to have the cap as well, if it is re-petroleum jelly the pipe and then slide your mould back in so that the base of the mould is at the bottom of the pipe, taking care not to touch the exposed die face. You will get a load of petroleum jelly squeeze out of the base as the mould goes in but thats fine a thin layer on the inside is all you need.
If your pipe isn’t tall enough to make a decent sized cap (2cms deep minimum)then take some of the wide tape and make an extension by wrapping it around the top of the pipe, the cap will then have a little lip where it overflows the top of the pipe and hits the tape but it will at least be thick enough to ensure it stays in place.
Silicone part two:
Mix up your silicone as before, obviously don’t make quite as much as you are only doing lids not covering the entier die.
Personally, I have dump moulds for my excess resin made from dump mould casings for my excess silicone. For me, this was a cast of a set of my ear tunnel plugs. You might not need to find a home for a lot of excess silicone but it might pay to have something prepared just in case. I used an oval 3D printed pipe and used the same tape and hot glue method do set it up so that it was ready if I needed it.
Again, stand up and pour high, slow and thin onto the silicone at the side of the die face. You want the fresh silicone to flow slowly into the number at the top to force out any air so it is not trapped. Fill up the required depth on all of your moulds and then if you have enough excess, pour it into your dump mould.

Once done, put them back into the pressure pot at the same PSI you did the bottom half at or leave them out on a level surface covered with a box to keep them protected while they cure.
Final removal:
Once set, take your mould casings and push the dice mould out from the bottom. If the petroleum jelly layer was sufficient the cap will pop right off without trouble otherwise you may need your sharp craft knife to gently seperate any connected bits.
Now you need to remove your masters, push from the bottom of the mould while gently peeling away the sides, this needs to be done gently as depending on how deep your numbers or logo is, you could tear the silicone if you just wrench it out, especially with the d20 and d12. If you aren’t feeling confident with removal, start with the d4 (caltrop, crystal or shard as there are only four sides to deal with) to get an idea of how to push up the die from the mould before moving onto the d6 to get a feel of how to peel the sides away to release the numbers. The others, in ascending order increase with difficulty for extraction so you can build up your confidence. Soapy water also helps, as it lubricates the master in there to help it pop out, just make sure that your mould is absolutely bone dry before pouring any resin in it.